|
|
 |
Napkin with lace machine embroidery design
Main page  Napkin with lace machine embroidery design
Embroidering decorative napkin with joinings and lace stitch
This article will show you how to make an embroidered napkins with lace stitch from common ones, which you can find in many shops. They often are made of a good fabric but look too simple. And this will help you to make your own decorative napkin.
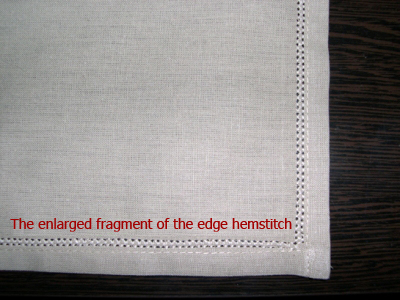
 Stage 1: preparing for the embroidering. Look at the edge of the napkin. It`s just stitched. To give it more fresh look you can make a hemstitch work, drawing off the edge 1 cm. To make it insert the needle with wings for the hemstitch, choose corresponding line and scribble the perimeter of the napkin. Stage 1: preparing for the embroidering. Look at the edge of the napkin. It`s just stitched. To give it more fresh look you can make a hemstitch work, drawing off the edge 1 cm. To make it insert the needle with wings for the hemstitch, choose corresponding line and scribble the perimeter of the napkin.
This is what we`ve got.
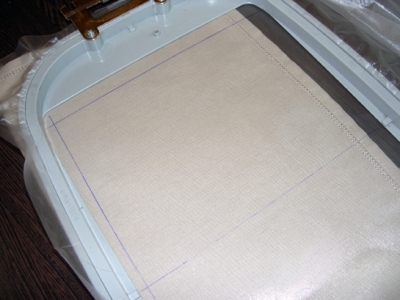
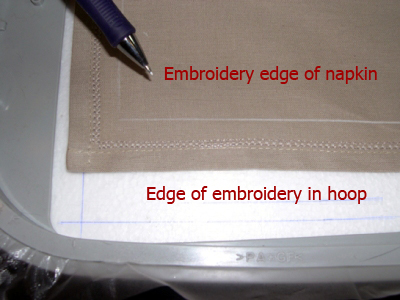
Measure the size of the embroidery place and mark it on the already handmade napkin. In this example the place is 40x42 cm. There is a draw off the hemstitch 1 cm, because the lace machine embroidery design isn`t look good without this drawing off.

Stage 2: After the embroidering we have 40 x 42 cm of free space on the towel. Divide it for 4 squares of 20 x 21 cm size. Imagine that your napkin embroidery design consists of this 4 squares. In this article themachine embroidery design Enigma Embroidery - EE061 VINTAGE CUTWORK is shown. We make the full composition from different parts of the machine embroidery design. The most important thing here is not to lose the order of treads and its quantity. If you embroider the lace embroidery, pay attention to the contour stitch! It gets lost sometimes while combining the embroidery design elements. Do watch the design for the embroidery sequence and quantity of the embroidery threads after collecting all the elements. Then make emulation of the full composition.
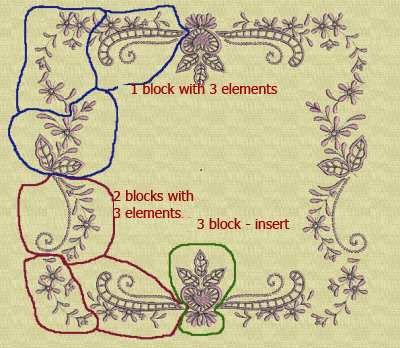
In this example there are 2 compositions of 3 elements with 1 insert (which is called 3rd insert block).
Stage 3: preparing for the embroidering. You can use a variety of methods for placing the machine embroidery design and its connections. In this article the method that allows to join the napkin design parts without printing the design itself is shown. Put the water-soluble slick into the embroidery hoop, make needed marks on it: center and edges of the embroidery place. Do be very attentive with it because the machine embroidery designs must be joined very clear.
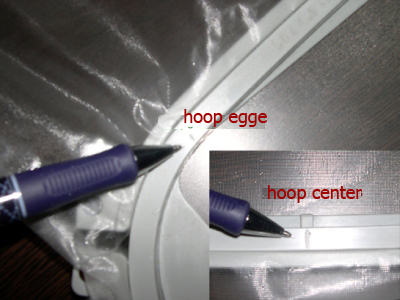
If you have the BROTHER PR 620 embroidery machine (like in this instruction) there are marked edge and centre of the embroidering place on your hoop.
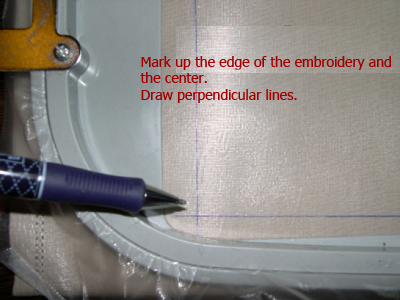
Mark it yourself if it isn`t.
Let`s start the embroidering from the corner, from the edge of the design.
So we need just to combine the edge of the embroidering on the hoop which is marked and the edge of embroidering on the napkin.
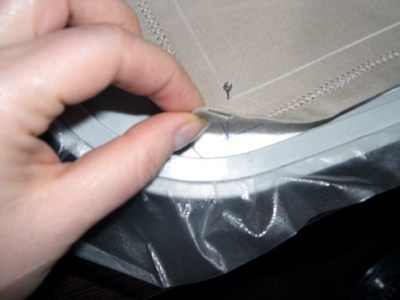
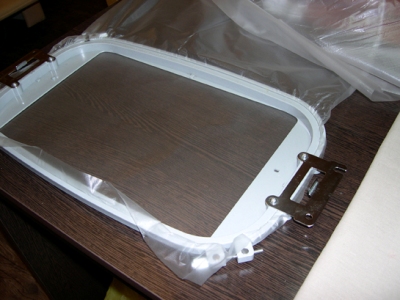
Place the hoop on a piece of polyfoam, fix it with pins.
Tip: it`s very simple and convenient device: just a cube of a polyfoam to place under the hoop when fixing the fabric to the slice. If you won`t have any support, the pin don`t stay at its place.

Then lift accurately part of the fabric and the machine embroidery design,
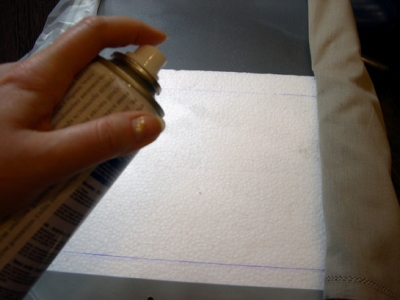
spray the glue beneath that.
Now the fabric is fixed on the slice. Take out the pins. Additively fix napkin and slice in the hoop with pins behind embroidery place`s edges.
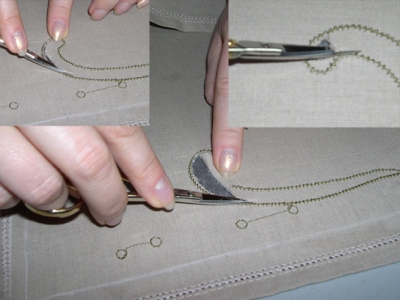
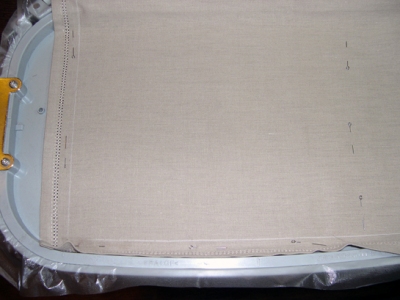
Stage of embroidering: place the machine embroidery design at the corresponding side of the napkin in the hoop, the side that you embroider. After sewing the contours take the hoop out of the machine, cut the fabric accurately and without touching the slice. Do not take anything from the hoop!
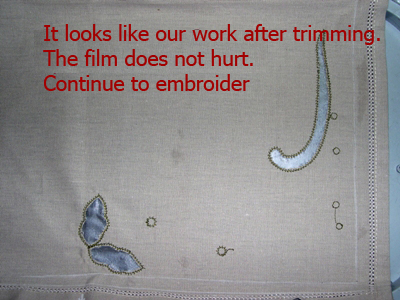
This is how it must look: design is cut and the slice isn`t torn
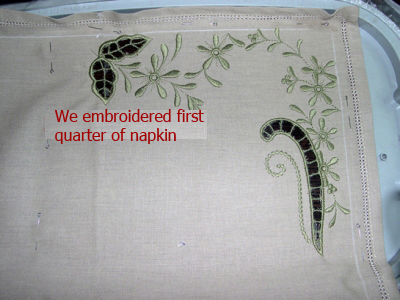
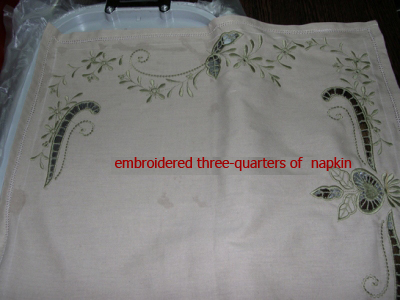
Embroider the machine embroidery design (its quarter) up to the end.

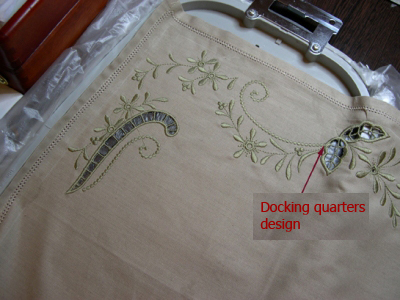
Now join second corner of the embroidered napkin. This is full specular reflection of the machine embroidery design we`ve just sewed.
Fix opposite corner of the napkin, it`s the upper right one in this article.
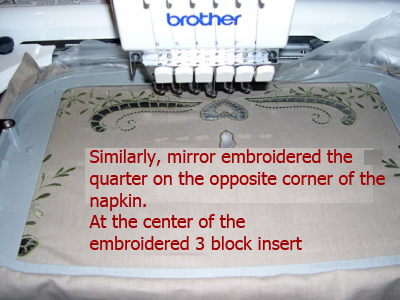
Position the design in the upper right corner in the machine and sew the same way. As we have embroidered the second quarter above 2 specular parts, we plan to paste there the insert block which is to be embroidered right now.
As it`s placed right in the center of the napkin, join the centers on the napkin and the center line drawn on the slice. Position the design in the upper middle in the embroidering machine. Embroider the contour, cut the fabric and embroider up to the end.
Now embroider next corner of the decorated napkin. Fix this corner like before and embroider the contour, cut the fabric, embroider up to the end.
And the final stage: embroidering the 4th corner of the napkin. Remember order of actions. The slick`s in the hoop, mark on it the lines on the edges of the embroidering and its middle.
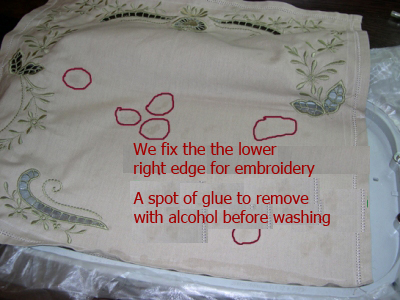
Tip: you can see the marked stains of glue on the napkin. Don`t worry about it: you can get rid of it by wiping with tampon moistened in alcohol.
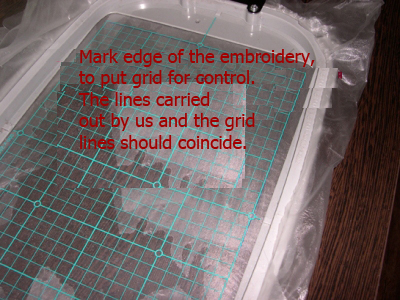
You can check your accuracy with special mark grid you can find in the complete set with the hoop.
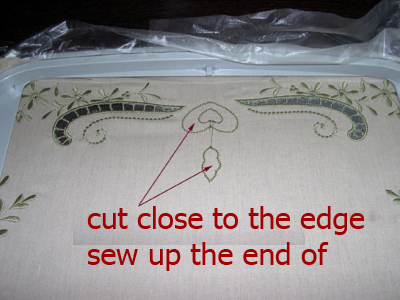
Sew the contour, take the hoop out of the machine, cut near the edge without touching the slick.
Embroidered.
Now it`s time to embroider 3rd insert block. It`s placed on the embroidered napkin`s middle line between edges of the quarters of the machine embroidery design.
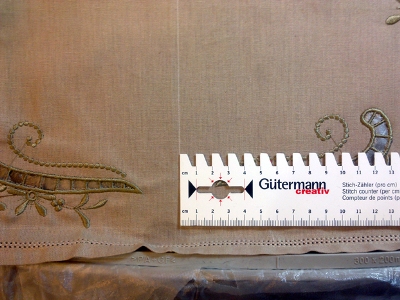
This is how it looks
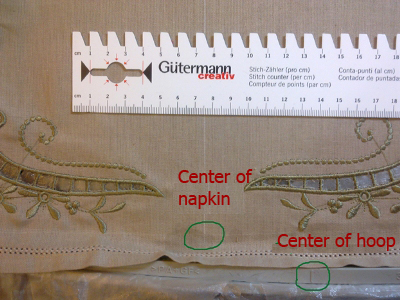
Take the ruler and measure the distance.
The distance between the middles is 6 cm. That means we just shift position of the pictures edge on 6 cm more to the left of the center. If your machine doesn`t support this functions, take the napkin out of the hoop, center it as it`s described above and embroider.
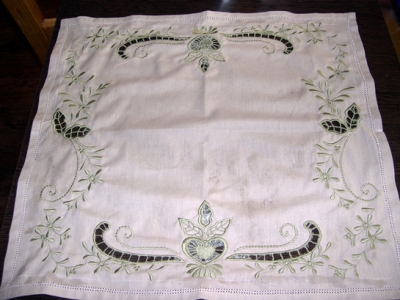
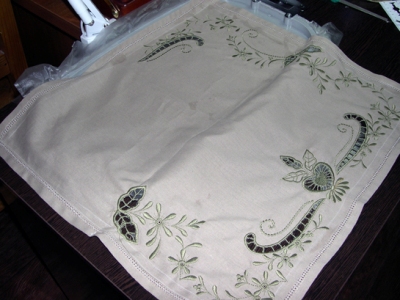
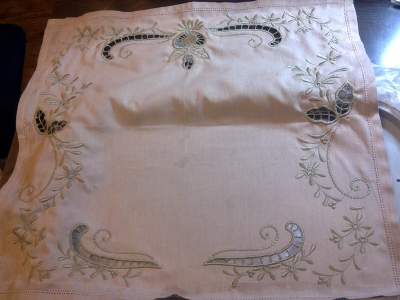
This is what we`ve got in the end.
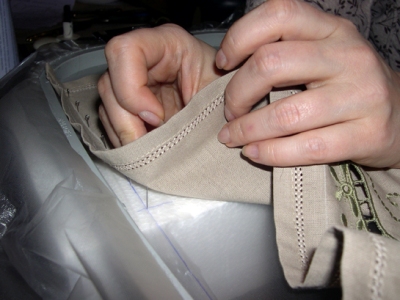
Just wash your new embroidered napkin with lace stitch and iron it. You can also iron it with starch spray, so the napkin will stay at its original shape and the design won`t be crushed.
|
|
|
 Instant Download