Sewing the "Bolt" Baseball Cap
Hello. Firstly I say I don`t apply for an exclusivity, I will just show my embroidered baseball cap sewing method. Maybe this will be helpful for somebody.
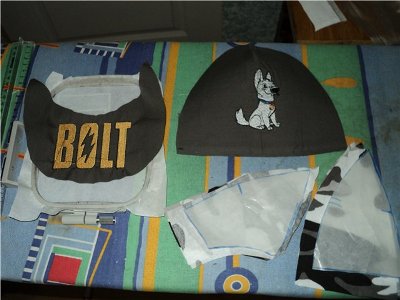
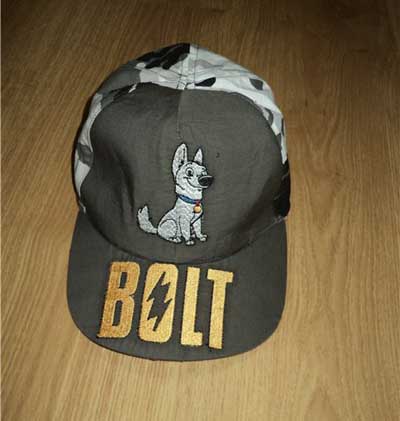 We will sew the embroidered baseball cap for a boy 4-5 years old like this:
So we`ll need:
The fabric itself which will be sewed (in first case one had had pieces of old jeans);
Thin strip of synthetic winterizer;
Slanting satin inlay;
Sticking ribbon;
It`s better if you have plastic cap peak (it can be replaced with handmade one produced from several lays of collar interfacing).
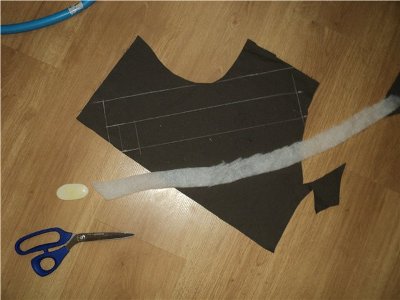
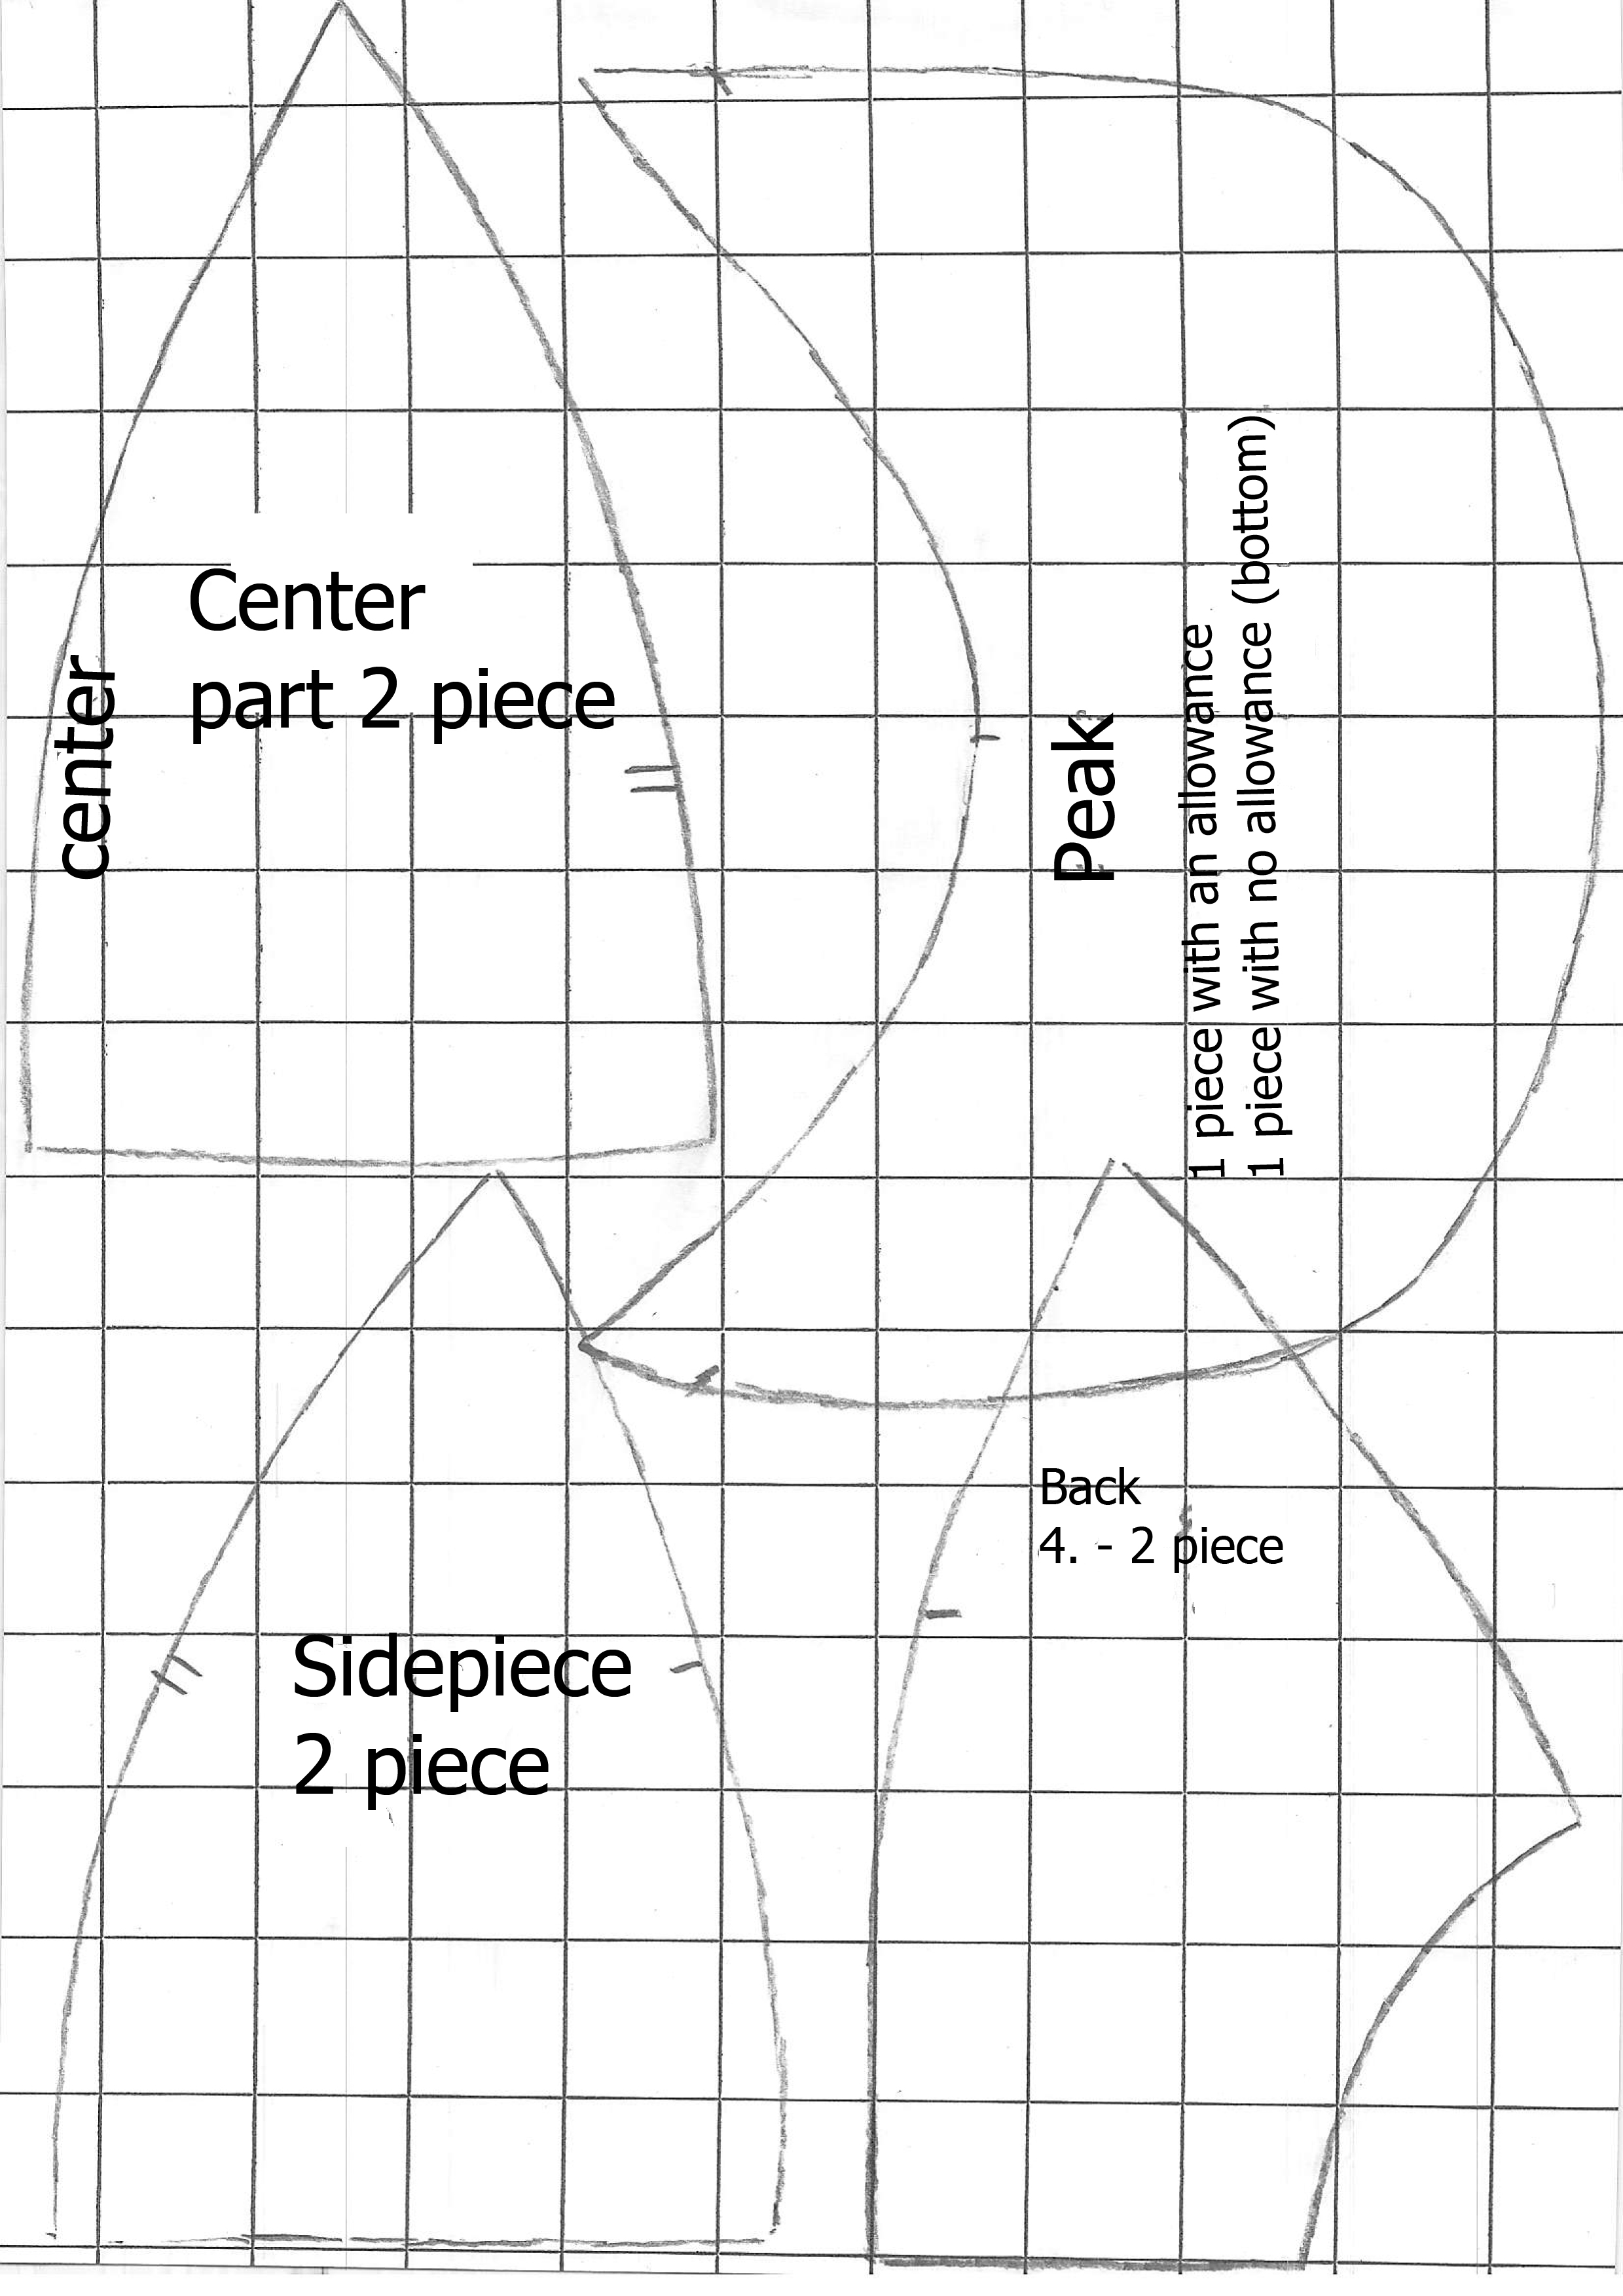
The cutting:
2 central wedge detail Ц allowance 0.5 cm at the sides and 1 cm at the down
2 side wedge details - allowance 0.5 cm at the sides and 1 cm at the down
2 back wedge details - allowance 0.5 cm at the sides and 1 cm at the down
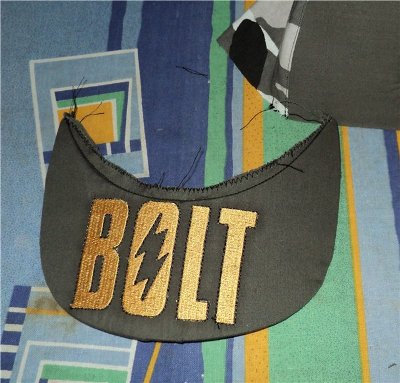
Upper cap peak detail is with 0.5 cm allowance and lower detail cut without any allowance.
 Ribbon of synthetic winterizer Ц 3 cm width and 60 cm long
Ribbon of basic cloth cut with 45 degrees to the portion line 5 cm width and 60 cm long.
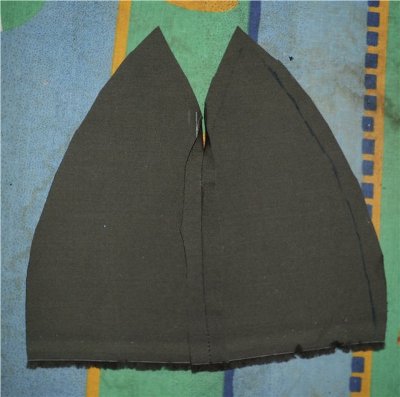
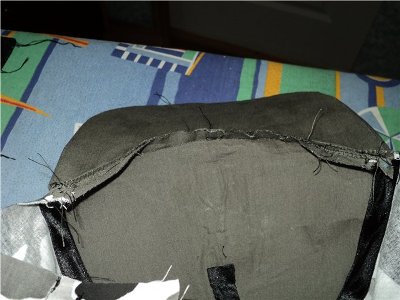
Sew up central wedge details for 2/3 of length from down, then iron the stitch.
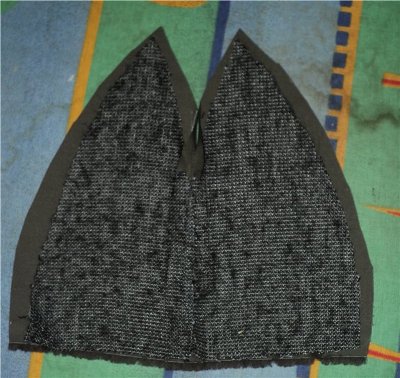 Cut off 2 details from glued laying and duplicate central piece from inside.
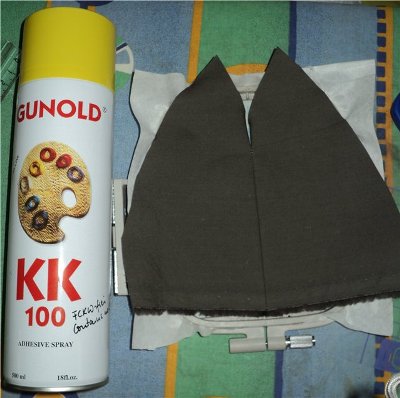
 Put the collar interfacing into the hoop and fix the detail with spray glue. Then sew. The inscription on the upper side of cap peak can be sewed this way.
 Now sew up 1/3 of stitch left on the central part, and then iron the allowance.
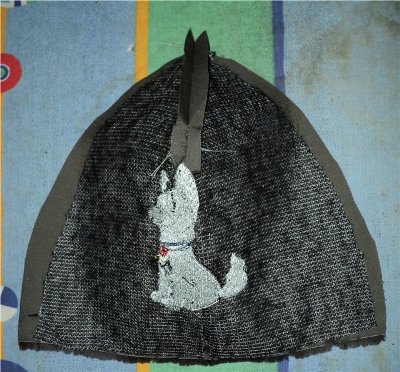
Then we can process inside of the central part in different ways. It may be simply duplicated with warp knitted collar interfacing, we can paste clean inside or paste cotton cloth with web-like placed glue. We can also cut off another 2 central wedge details and sew them up by the central stitch and apply with already sewn central part by insides.
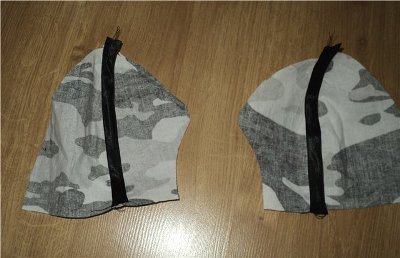
 Now sew up the side part with back one. Stitches must be ironed apart or ironed to one side. This depends on cloth thickness. Scribble the slanting inlay from inside covering the stitch. Try and keep the stitch in the middle of slanting inlay, because these lines will be finishing on the face side. Then apply just made details face to face and sew up the back stitch processing it with slanting inlay the same way.
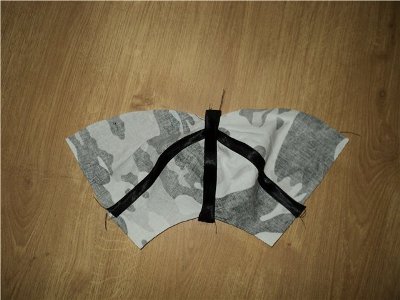
 Now sew up the central part with side parts of the baseball cap, at the top turn the needle carefully to make a corner, iron the stitch to the side of side stitches and cover it with slanting inlay.
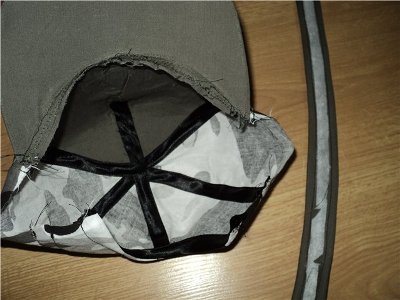
 Now sew up cap peak details accurately combining the edges, lightly stretching lower detail, width of allowance must be 0.5 cm. Turn the cap inside down and insert the plastic preparation. As the upper detail is bigger, there is edging at the down. Combine open cuts of the cap peak and sweep them with the zigzag sewing machine. Then make fixing line as close to the plastic cap peak as it possible.
 This is the most interesting stuff: we must connect the peak with the cup. I combine the middle of the peak with the middle of the cup and sew up the peak from center to the right and then left sides. (It`s not the most comfort way but working one).
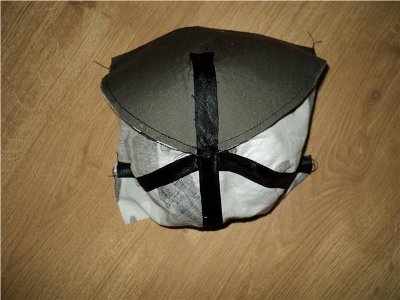
 Now put down the cap and make the ribbon which we`ll sew inside the cap. Cut off slanting ribbon approx. 50 cm long and 5 cm width and a ribbon of synthetic winterizer width 3 cm. Then apply the winterizer with the ribbon detail and make a stitch in the middle, then bend around the winterizer with the ribbon and make a stitch at the edge on both sides. Ribbon is done.
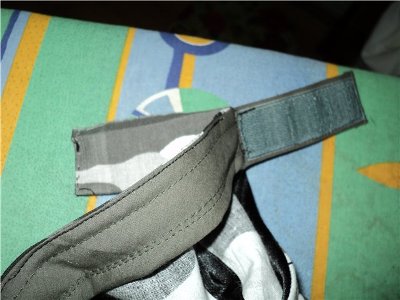
Before sewing the ribbon to the cap, process the semicircular cut on the back wedges. To do this take slanting inlay and apply it face to face with the edge of semicircular cut and sew up with 0.5 cm width. Then bend around the edge and scribble slanting inlay to the back wedges by semicircular cut. The ribbon can be scribbled now.
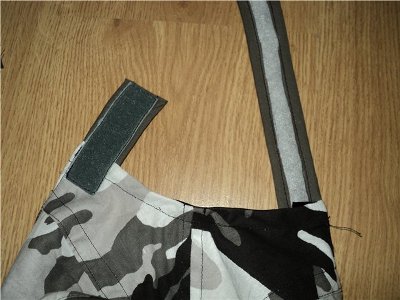
Iron the lower edge of the cup to approximately 0.7 cm and sew up the ribbon trying to sew with distance 1-2 mm from the edge. Begin from semicircular cut on the back wedges and leave the allowance of the ribbon approximately 4-5 cm. Scribble the sticking ribbon to the allowance left and this is it Ц the baseball cup is done
I hope my modest experience will be helpful to anybody.
Instuction author; Limoshka (Belgorod Russia)
 Instant Download


